ChannelPipeline
架构设计:
Channel都有且仅有一个ChannelPipeline与之对应,Channel包含了ChannelPipeline,ChannelPipeline内部包含了N个handler,每一个handler都是由一个线程去执行;
ChannelPipeline内部维护了一个由ChannelHandlerContext组成的双向链表,头为HeadContext,尾为TailHandler(双向链表为自己写的,而不是使用JDK的链表,为了轻量级),并且每个ChannelHandlerContext中又关联着一个ChannelHandler,下图提供参考:

传播inbound事件
在业务代码中, 我们自己的handler往往会通过重写channelRead方法来处理对方发来的数据, 那么对方发来的数据是如何走到channelRead方法中了呢?
在业务代码中, 传递channelRead事件方式是通过fireChannelRead方法进行传播的
两种写法:
@Override
public void channelRead(ChannelHandlerContext ctx, Object msg) throws Exception {
    //写法1:
    ctx.fireChannelRead(msg);
    //写法2
    ctx.pipeline().fireChannelRead(msg);
}
这里重写了channelRead方法, 并且方法体内继续通过fireChannelRead方法进行传播channelRead事件, 那么这两种写法有什么异同?
我们先以 写法2 为例, 将这种写法进行剖析
这里首先获取当前context的pipeline对象, 然后通过pipeline对象调用自身的fireChannelRead方法进行传播, 因为默认创建的 DefaultChannelpipeline
我们跟到DefaultChannelpipeline的fireChannelRead方法中:
public final ChannelPipeline fireChannelRead(Object msg) {
    AbstractChannelHandlerContext.invokeChannelRead(head, msg);
    return this;
}
这里首先调用的是AbstractChannelHandlerContext类的静态方法invokeChannelRead, 参数传入head节点和事件的消息
我们跟进invokeChannelRead方法:
static void invokeChannelRead(final AbstractChannelHandlerContext next, Object msg) {
    final Object m = next.pipeline.touch(ObjectUtil.checkNotNull(msg, "msg"), next);
    EventExecutor executor = next.executor();
    if (executor.inEventLoop()) {
        next.invokeChannelRead(m);
    } else {
        executor.execute(new Runnable() {
            @Override
            public void run() {
                next.invokeChannelRead(m);
            }
        });
    }
}
这里的Object m 中msg通常就是我们传入的msg, 而next, 目前是head节点, 然后再判断是否为当前eventLoop线程, 如果不是则将方法包装成task交给eventLoop线程处理
我们跟到invokeChannelRead方法中:
private void invokeChannelRead(Object msg) {
    if (invokeHandler()) {
        try {
            ((ChannelInboundHandler) handler()).channelRead(this, msg);
        } catch (Throwable t) {
            notifyHandlerException(t);
        }
    } else {
        fireChannelRead(msg);
    }
}
首先通过invokeHandler()判断当前handler是否已添加, 如果添加, 则执行当前handler的chanelRead方法, 其实这里我们基本上就明白了, 通过fireChannelRead方法传递事件的过程中, 其实就是找到相关handler执行其channelRead方法, 由于我们在这里的handler就是head节点, 所以我们跟到HeadContext的channelRead方法中:
HeadContext的channelRead方法:
public void channelRead(ChannelHandlerContext ctx, Object msg) throws Exception {
    //向下传递channelRead事件
    ctx.fireChannelRead(msg);
}
在这里我们看到, 这里通过fireChannelRead方法继续往下传递channelRead事件, 而这种调用方式, 就是我们刚才分析用户代码的第一种调用方式,回头看一开始的channelRead:
public void channelRead(ChannelHandlerContext ctx, Object msg) throws Exception {
    //写法1:
    ctx.fireChannelRead(msg);
    //写法2
    ctx.pipeline().fireChannelRead(msg);
}
这里直接通过context对象调用fireChannelRead方法, 那么和使用pipeline调用有什么区别呢
我们回到HeadContext的channelRead方法, 我们来剖析ctx.fireChannelRead(msg)这句, 大家就会对这个问题有答案了, 跟到ctx的fireChannelRead方法中, 这里会走到AbstractChannelHandlerContext类中的fireChannelRead方法中
跟到AbstractChannelHandlerContext类中的fireChannelRead方法:
public ChannelHandlerContext fireChannelRead(final Object msg) {
    invokeChannelRead(findContextInbound(), msg);
    return this;
}
这里我们看到, invokeChannelRead方法中传入了一个findContextInbound()参数, 而这findContextInbound方法其实就是找到当前Context的下一个节点
跟到findContextInbound方法:
private AbstractChannelHandlerContext findContextInbound() {
    AbstractChannelHandlerContext ctx = this;
    do {
        ctx = ctx.next;
    } while (!ctx.inbound);
    return ctx;
}
这里的逻辑也比较简单, 是通过一个doWhile循环, 找到当前handlerContext的下一个节点, 这里要注意循环的终止条件, while (!ctx.inbound)表示下一个context标志的事件不是inbound的事件, 则循环继续往下找, 言外之意就是要找到下一个标注inbound事件的节点
有关事件的标注, 如果是用户定义的handler, 是通过handler继承的接口而定的, 如果tail或者head, 那么是在初始化的时候就已经定义好
回到AbstractChannelHandlerContext类的fireChannelRead方法中:
public ChannelHandlerContext fireChannelRead(final Object msg) {
    invokeChannelRead(findContextInbound(), msg);
    return this;
}
找到下一个节点后, 继续调用invokeChannelRead方法, 传入下一个和消息对象:
static void invokeChannelRead(final AbstractChannelHandlerContext next, Object msg) {
    final Object m = next.pipeline.touch(ObjectUtil.checkNotNull(msg, "msg"), next);
    //第一次执行next其实就是head
    EventExecutor executor = next.executor();
    if (executor.inEventLoop()) {
        next.invokeChannelRead(m);
    } else {
        executor.execute(new Runnable() {
            @Override
            public void run() {
                next.invokeChannelRead(m);
            }
        });
    }
}
这里的逻辑我们又不陌生了, 因为我们传入的是当前context的下一个节点, 所以这里会调用下一个节点invokeChannelRead方法, 因我们刚才剖析的是head节点, 所以下一个节点有可能是用户添加的handler的包装类HandlerConext的对象
这里我们跟进invokeChannelRead方法中去:
private void invokeChannelRead(Object msg) {
    if (invokeHandler()) {
        try {
            ((ChannelInboundHandler) handler()).channelRead(this, msg);
        } catch (Throwable t) {
            //发生异常的时候在这里捕获异常
            notifyHandlerException(t);
        }
    } else {
        fireChannelRead(msg);
    }
}
又是我们熟悉的逻辑, 调用了自身handler的channelRead方法, 如果是用户自定义的handler, 则会走到用户定义的channelRead()方法中去, 所以这里就解释了为什么通过传递channelRead事件, 最终会走到用户重写的channelRead方法中去
同样, 也解释了最初提到过的两种写法的区别:
public void channelRead(ChannelHandlerContext ctx, Object msg) throws Exception {
    //写法1:
    ctx.fireChannelRead(msg);
    //写法2
    ctx.pipeline().fireChannelRead(msg);
}写法1是通过当前节点往下传播事件
写法2是通过head头节点往下传递事件
所以, 在handler中如果如果要在channelRead方法中传递channelRead事件, 一定要采用写法2的方式向下传递, 或者交给其父类处理, 如果采用1的写法则每次事件传输到这里都会继续从head节点传输, 从而陷入死循环或者发生异常。
这里有一点需要注意, 如果用户代码中channelRead方法, 如果没有显示的调用ctx.fireChannelRead(msg)那么事件则不会再往下传播, 则事件会在这里终止, 所以如果我们写业务代码的时候要考虑有关资源释放的相关操作。
如果ctx.fireChannelRead(msg)则事件会继续往下传播, 如果每一个handler都向下传播事件, 当然, 根据我们之前的分析channelRead事件只会在标识为inbound事件的HandlerConetext中传播, 传播到最后, 则最终会调用到tail节点的channelRead方法
我们跟到tailConext的channelRead方法中:
public void channelRead(ChannelHandlerContext ctx, Object msg) throws Exception {
    onUnhandledInboundMessage(msg);
}
我们跟进到onUnhandledInboundMessage方法中:
protected void onUnhandledInboundMessage(Object msg) {
    try {
        logger.debug(
                "Discarded inbound message {} that reached at the tail of the pipeline. " +
                        "Please check your pipeline configuration.", msg);
    } finally {
        //释放资源
        ReferenceCountUtil.release(msg);
    }
}
这里做了释放资源的相关的操作
至此, channelRead事件传输相关罗辑剖析完整, 对于inbound事件的传输流程都会遵循这一逻辑。
pipeline的addLast方法
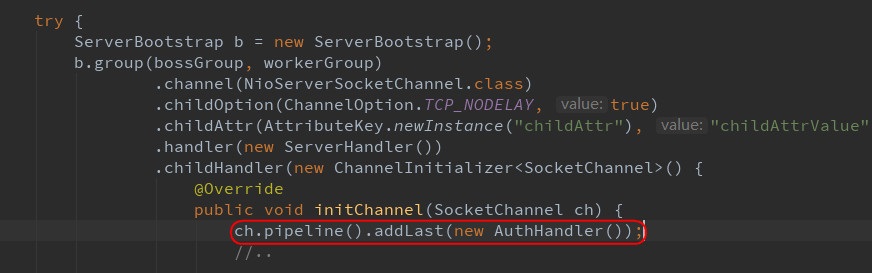
简单来说,pipeline.addLast()添加handler节点后,回调callHandlerAdded()方法,最终调用ChannelInitializer的initChannel方法。
细节部分转载于:https://blog.csdn.net/qq_16192007/article/details/92752048
跟踪到DefaultChannelPipeline # ChannelPipeline addLast(EventExecutorGroup group, String name, ChannelHandler handler)
public final ChannelPipeline addLast(EventExecutorGroup group, String name, ChannelHandler handler) {
    final AbstractChannelHandlerContext newCtx;
    synchronized (this) {
        //(1)判断handler是否被重复添加
        checkMultiplicity(handler);
        //(2)创建一个HandlerContext并添加到列表
        newCtx = newContext(group, filterName(name, handler), handler);

        //(3)添加HandlerContext
        addLast0(newCtx);

        //是否已注册
        if (!registered) {
            newCtx.setAddPending();
            callHandlerCallbackLater(newCtx, true);
            return this;
        }

        EventExecutor executor = newCtx.executor();
        if (!executor.inEventLoop()) {
            newCtx.setAddPending();
            //回调用户事件
            executor.execute(new Runnable() {
                @Override
                public void run() {
                    callHandlerAdded0(newCtx);
                }
            });
            return this;
        }
    }
    //(4)回调添加事件
    callHandlerAdded0(newCtx);
    return this;
}
重复添加验证
我们跟到checkMultiplicity(handler)中:
private static void checkMultiplicity(ChannelHandler handler) {
    if (handler instanceof ChannelHandlerAdapter) {
        ChannelHandlerAdapter h = (ChannelHandlerAdapter) handler;
        if (!h.isSharable() && h.added) {
            throw new ChannelPipelineException(
                    h.getClass().getName() +
                    " is not a @Sharable handler, so can't be added or removed multiple times.");
        }
        //满足条件设置为true, 代表已添加
        h.added = true;
    }
}
首先判断是不是ChannelHandlerAdapter类型, 因为我们自定义的handler通常会直接或者间接的继承该接口, 所以这里为true
拿到handler之后转换成ChannelHandlerAdapter类型, 然后进行条件判断if (!h.isSharable() && h.added)代表如果不是共享的handler, 并且是未添加状态, 则抛出异常:
public boolean isSharable() {
    Class<?> clazz = getClass();
    Map<Class<?>, Boolean> cache = InternalThreadLocalMap.get().handlerSharableCache();
    Boolean sharable = cache.get(clazz);
    if (sharable == null) {
        //如果这个类注解了Sharable.class, 说明这个类会被多个channel共享
        sharable = clazz.isAnnotationPresent(Sharable.class);
        cache.put(clazz, sharable);
    }
    return sharable;
}
首先拿到当前handler的class对象然后再从netty自定义的一个ThreadLocalMap对象中获取一个盛放handler的class对象的map, 并获取其value。如果value值为空, 则会判断是否被Sharable注解, 并将自身 handler class 对象和判断结果存入map对象中, 最后返回判断结果
这说明了被Sharable注解的handler是一个共享handler,从这个逻辑我们可以判断, 共享对象是可以重复添加的。
创建HandlerContext并添加到列表
如果是共享对象或者没有被添加, 则将ChannelHandlerAdapter的added设置为true, 代表已添加。剖析完了重复添加验证, 回到addLast方法中, 我们看第二步, 创建一个HandlerContext并添加到列表:
newCtx = newContext(group, filterName(name, handler), handler);首先看filterName(name, handler)方法, 这个方法是判断添加handler的name是否重复
private String filterName(String name, ChannelHandler handler) {
    if (name == null) {
        //没有名字创建默认名字
        return generateName(handler);
    }
    //检查名字是否重复
    checkDuplicateName(name);
    return name;
}
因为我们添加handler时候, 不一定会会给handler命名, 所以这一步name有可能是null, 如果是null, 则创建一个默认的名字,generateName(handler)类似Spring的beanFactory给每个bean起名字,为类名首字母小写,这里同样会起名字,名字我们看源码:
private String generateName(ChannelHandler handler) {
    Map<Class<?>, String> cache = nameCaches.get();//会有一个缓存
    Class<?> handlerType = handler.getClass();
    String name = cache.get(handlerType);
    if (name == null) {
        //return StringUtil.simpleClassName(handlerType) + "#0";
        //假设handler名字为PdcHandler,则name为PdcHandler#0
        name = generateName0(handlerType);
        cache.put(handlerType, name);
    }
    return name;
}
然后再检查名字是否重复checkDuplicateName(name)这个方法中:
private void checkDuplicateName(String name) {
    //不为空
    if (context0(name) != null) {
        throw new IllegalArgumentException("Duplicate handler name: " + name);
}

private AbstractChannelHandlerContext context0(String name) {
    //遍历pipeline
    AbstractChannelHandlerContext context = head.next;
    while (context != tail) {
        //发现name相同, 说明存在handler
        if (context.name().equals(name)) {
            //返回
            return context;
        }
        context = context.next;
    }
    return null;
}
这里做的操作非常简单, 就是将pipeline中, 从head节点往下遍历HandlerContext, 一直遍历到tail, 如果发现名字相同则会认为重复并返回HandlerContext对象。
我们回到addLast()方法中并继续看添加创建相关的逻辑:newCtx = newContext(group, filterName(name, handler), handler)
中 filterName(name, handler)这步如果并没有重复则会返回handler的name。
跟到newContext(group, filterName(name, handler), handler)方法中
private AbstractChannelHandlerContext newContext(EventExecutorGroup group, String name, ChannelHandler handler) {
    return new DefaultChannelHandlerContext(this, childExecutor(group), name, handler);
}
这里我们看到创建了一个DefaultChannelHandlerContext对象, 构造方法的参数中, 第一个this代表当前的pipeline对象, group为null, 所以childExecutor(group)也会返回null, name为handler的名字, handler为新添加的handler对象。
继续跟到DefaultChannelHandlerContext的构造方法
DefaultChannelHandlerContext(
        DefaultChannelPipeline pipeline, EventExecutor executor, String name, ChannelHandler handler) {
    super(pipeline, executor, name, isInbound(handler), isOutbound(handler));
    if (handler == null) {
        throw new NullPointerException("handler");
    }
    this.handler = handler;
}
我们看到首先调用了父类的构造方法, 之后将handler赋值为自身handler的成员变量, HandlerContext和handler关系在此也展现了出来, 是一种组合关系。
我们首先看父类的构造方法,有这么两个参数:isInbound(handler), isOutbound(handler),这两个参数意思是判断需要添加的handler是inboundHandler还是outBoundHandler
同样我们看isOutbound(handler)方法
private static boolean isOutbound(ChannelHandler handler) {
    return handler instanceof ChannelOutboundHandler;
}
通过判断是否实现 ChannelOutboundHandler 接口,判断是否为 outboundhandler
跟到其父类AbstractChannelHandlerContext的构造方法中:
AbstractChannelHandlerContext(DefaultChannelPipeline pipeline, EventExecutor executor, String name,
                              boolean inbound, boolean outbound) {
    this.name = ObjectUtil.checkNotNull(name, "name");
    this.pipeline = pipeline;
    this.executor = executor;
    this.inbound = inbound;
    this.outbound = outbound;
    ordered = executor == null || executor instanceof OrderedEventExecutor;
}
一切都不陌生了, 因为tail节点和head节点创建的时候同样走到了这里。这里初始化了name, pipeline, 以及标识添加的handler是inboundhanlder还是outboundhandler
添加HandlerContext
回到最初的addLast()方法中:跟完了创建HandlerContext的相关逻辑, 我们继续跟第三步, 添加HandlerContext
private void addLast0(AbstractChannelHandlerContext newCtx) {
    //拿到tail节点的前置节点
    AbstractChannelHandlerContext prev = tail.prev;
    //当前节点的前置节点赋值为tail节点的前置节点
    newCtx.prev = prev;
    //当前节点的下一个节点赋值为tail节点
    newCtx.next = tail;
    //tail前置节点的下一个节点赋值为当前节点
    prev.next = newCtx;
    //tail节点的前一个节点赋值为当前节点
    tail.prev = newCtx;
}
之后会判断当前线程线程是否为eventLoop线程, 如果不是eventLoop线程, 就将添加回调事件封装成task交给eventLoop线程执行, 否则, 直接执行添加回调事件callHandlerAdded0(newCtx)
回调添加事件(callHandlerAdded0方法)
private void callHandlerAdded0(final AbstractChannelHandlerContext ctx) {
    try {
        ctx.handler().handlerAdded(ctx);
        ctx.setAddComplete();
    } catch (Throwable t) {
        //忽略代码
    }
}我们重点关注这句ctx.handler().handlerAdded(ctx)
其中ctx是我们新创建的HandlerContext, 通过handler()方法拿到绑定的handler, 也就是新添加的handler, 然后执行handlerAdded(ctx)方法, 如果我们没有重写这个方法, 则会执行父类的该方法
在ChannelHandlerAdapter类中定义了该方法的实现:
@Override
public void handlerAdded(ChannelHandlerContext ctx) throws Exception {
}
我们看到没做任何操作, 也就是如果我们没有重写该方法时, 如果添加handler之后将不会做任何操作, 这里如果我们需要做一些业务逻辑, 可以通过重写该方法进行实现。
以上就是添加handler的有关的业务逻辑。
handler的删除
如果用户在业务逻辑中进行ctx.pipeline().remove(this)这样的写法, 或者ch.pipeline().remove(new SimpleHandler())这样的写法, 则就是对handler进行删除, 我们学习过添加handler的逻辑, 所以对handler删除操作理解起来也会比较容易
public final ChannelPipeline remove(ChannelHandler handler) {
    remove(getContextOrDie(handler));
    return this;
}
方法体里有个remove()方法, 传入一个 getContextOrDie(handler)参数,这个 getContextOrDie(handler), 其实就是根据handler拿到其包装类HandlerContext对象:
private AbstractChannelHandlerContext getContextOrDie(ChannelHandler handler) {
    AbstractChannelHandlerContext ctx = (AbstractChannelHandlerContext) context(handler);
    //代码省略
}
这里仍然会通过context(handler)方法去寻找, 再跟进去
public final ChannelHandlerContext context(ChannelHandler handler) {
    if (handler == null) {
        throw new NullPointerException("handler");
    }
    //从头遍历节点
    AbstractChannelHandlerContext ctx = head.next;
    for (;;) {
        if (ctx == null) {
            return null;
        }
        //找到handler
        if (ctx.handler() == handler) {
            return ctx;
        }
        ctx = ctx.next;
    }
}
这里我们看到寻找的方法也非常的简单, 就是从头结点开始遍历, 遍历到如果其包装的handler对象是传入的handler对象, 则返回找到的handlerContext
回到remove(handler)方法:
public final ChannelPipeline remove(ChannelHandler handler) {
    remove(getContextOrDie(handler));
    return this;
}

private AbstractChannelHandlerContext remove(final AbstractChannelHandlerContext ctx) {

    //当前删除的节点不能是head, 也不能是tail
    assert ctx != head && ctx != tail;

    synchronized (this) {
        //执行删除操作
        remove0(ctx);
        if (!registered) {
            callHandlerCallbackLater(ctx, false);
            return ctx;
        }

        //回调删除handler事件
        EventExecutor executor = ctx.executor();
        if (!executor.inEventLoop()) {
            executor.execute(new Runnable() {
                @Override
                public void run() {
                    callHandlerRemoved0(ctx);
                }
            });
            return ctx;
        }
    }
    callHandlerRemoved0(ctx);
    return ctx;
}
首先要断言删除的节点不能是tail和head,然后通过remove0(ctx)进行实际的删除操作, 跟到remove0(ctx)中:
private static void remove0(AbstractChannelHandlerContext ctx) {
    //当前节点的前置节点
    AbstractChannelHandlerContext prev = ctx.prev;
    //当前节点的后置节点
    AbstractChannelHandlerContext next = ctx.next;
    //前置节点的下一个节点设置为后置节点
    prev.next = next;
    //后置节点的上一个节点设置为前置节点
    next.prev = prev;
}
这里的操作也非常简单, 做了一个指针移动的操作, 熟悉双向链表的小伙伴应该不会陌生。
回到remove(ctx)方法:我们继续往下看, 如果当前线程不是eventLoop线程则将回调删除事件封装成task放在taskQueue中让eventLoop线程进行执行,这跟inbound事件的invokeChannelRead方法一个处理方式, 否则, 则直接执行回调删除事件。
private void callHandlerRemoved0(final AbstractChannelHandlerContext ctx) {
    try {
        try {
            //调用handler的handlerRemoved方法
            ctx.handler().handlerRemoved(ctx);
        } finally {
            //将当前节点状态设置为已移除
            ctx.setRemoved();
        }
    } catch (Throwable t) {
        fireExceptionCaught(new ChannelPipelineException(
                ctx.handler().getClass().getName() + ".handlerRemoved() has thrown an exception.", t));
    }
}
与添加handler的逻辑一样, 这里会调用当前handler的handlerRemoved方法, 如果用户没有重写该方法, 则会调用其父类的方法, 方法体在ChannelHandlerAdapter类中有定义, 我们跟进去
public void handlerRemoved(ChannelHandlerContext ctx) throws Exception {

}
同添加handler一样, 也是一个空实现, 这里用户可以通过重写来添加自己需要的逻辑。
以上就是删除handler的相关操作。